Taking Your Linen Closet from Chaos to Calm
We moved three years ago after living in a charming, 50-year-old home, with underwhelming closet space, to a new home with a dreamy walk-in upstairs closet. And do you know what I quickly learned? The more space you have, the more you fill it with junk. And then more junk. And then every time you need to “hide” things before people come over, that big closet with a door always seems like the best spot. Until one day it looks like this.
I show you these pictures only to prove that even people who love to organize have problem areas in their homes. It’s so normal. Especially when you have extra little people running around your home all day. Enter the chaos. We will start there.
I don’t know about you, but every time I looked in that closet I felt anxious. It was time for a change. So what took me so long? Due to the size of this closet, I wanted to store lots of different things in there and needed time to be strategic on how to fit it all the best:
Home decor
Wrapping storage
Books – that I’ve read but want to keep for one reason or another
Photo albums
Paper towels + toilet paper – since we buy bulk at Costco
Beach toys
Workout weights + bands
Kids crafts + art supplies
Extra pillows, blankets, comforters when we have guests
Lots of things that need to find our Goodwill box or a different home
So where did I start?
STEP 1: Take everything out so you can sort + dispose
When tackling a project like this, it usually gets messier before it gets better. Just take a deep breath in those moments. I like to spread items out on the floor in categories {gift wrapping, books, crafts, decor, etc.} so I can see how much I have of each thing before I buy any bins.
Get two big trash bags out – one for donation items and one for trash items. Take the time to pull out those things you no longer need in your home.
STEP 2: Measure your shelves
I like to draw a {really quick unartistic} drawing of my space and put the dimensions in there so it’s easier for me to shop for bins. Get a tape measure and measure the length {side to side} + depth {front to back} + the height for each shelf.
STEP 3: Figure out your systems
Take a look at your organized piles you have made and then look at your empty closet. Decide how you would like to put it back in there. For example, how many craft/art bins will you need? How much space will my home decor take up on the shelves and does that stuff really need a bin?
You might find that you have bins or things to help you organize that are already in your closet or home – awesome! Call me OCD but I love for mine to match so I usually go for something new. I recently came across a website called Find Organizers That Fit – where you can essentially pick an organizing product type, enter your space dimensions on the side, and it will show you great bins that fit your dimensions.
STEP 4: Time to start organizing
But first, always test out your bins empty in your space first. Trust me, you don’t want to skip this step. Just picture them all full and ready to go and then you find out they don’t fit. Don’t be that girl.
Once you have verified everything fits, take your empty bins and shelves and start filling them. It’s like a puzzle, you may have to try a few different ways until you get it right. That’s totally okay! I did my home decor stuff first, and didn’t feel like I needed much for bins.
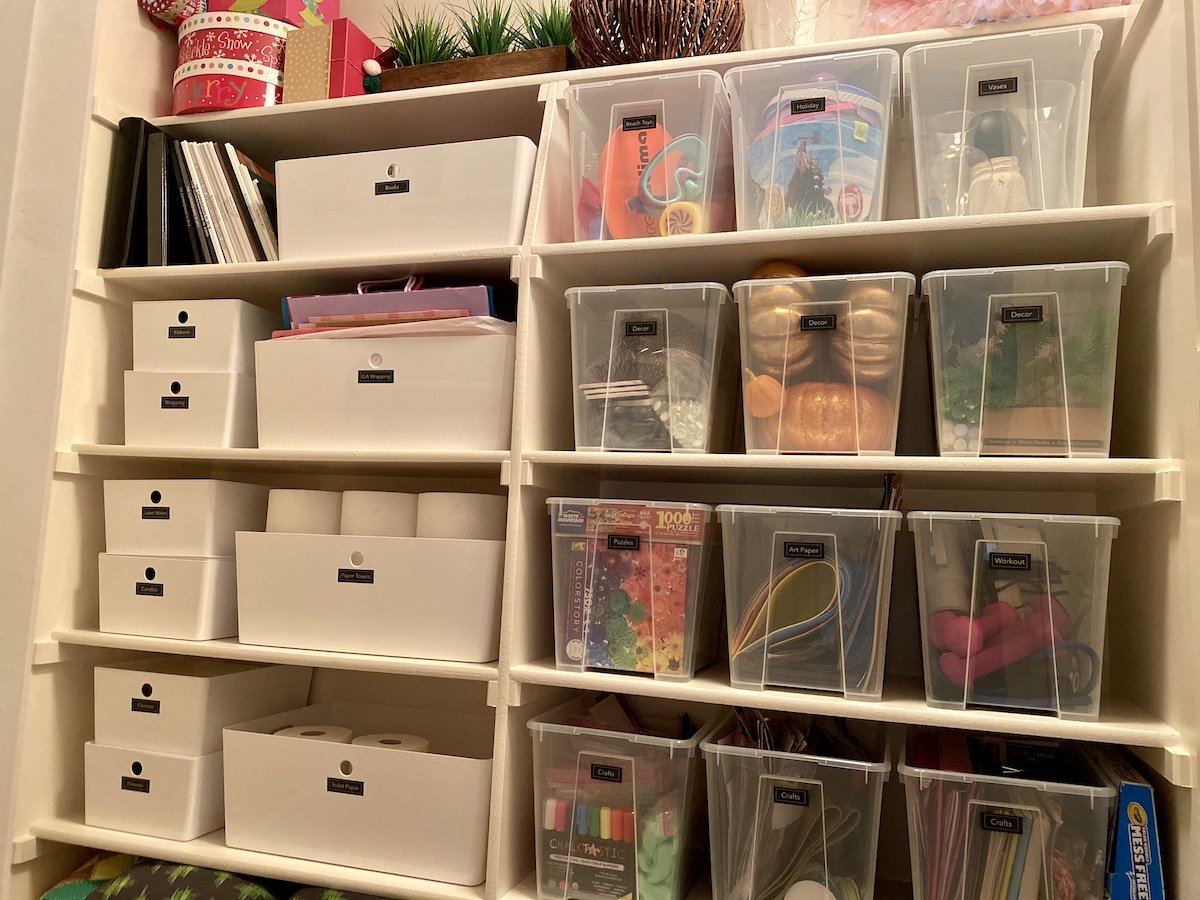
Then I set out all my clear bins – which I bought clear on purpose because I think my family does better with maintenance when they can see inside the bin and see a label. You can’t ever be too thorough in this department. Then I moved things around in the bins until it all fit!
On to the next side…books, albums, wrapping supplies and my Costco overflow. Once again, I laid out my bins on the floor by my piles and pieced it all together until it fit. For the gift wrapping, we don’t buy wrapping paper because, well, it just annoys me. But we have a plethora of gift bags + tissue. I found that the larger gift bags folded in half nicely and I folded the tissue in their normal three fold and placed it in the front of the bin. I did organize the gift bags by holiday, if that makes you weirdly happy like it does me.
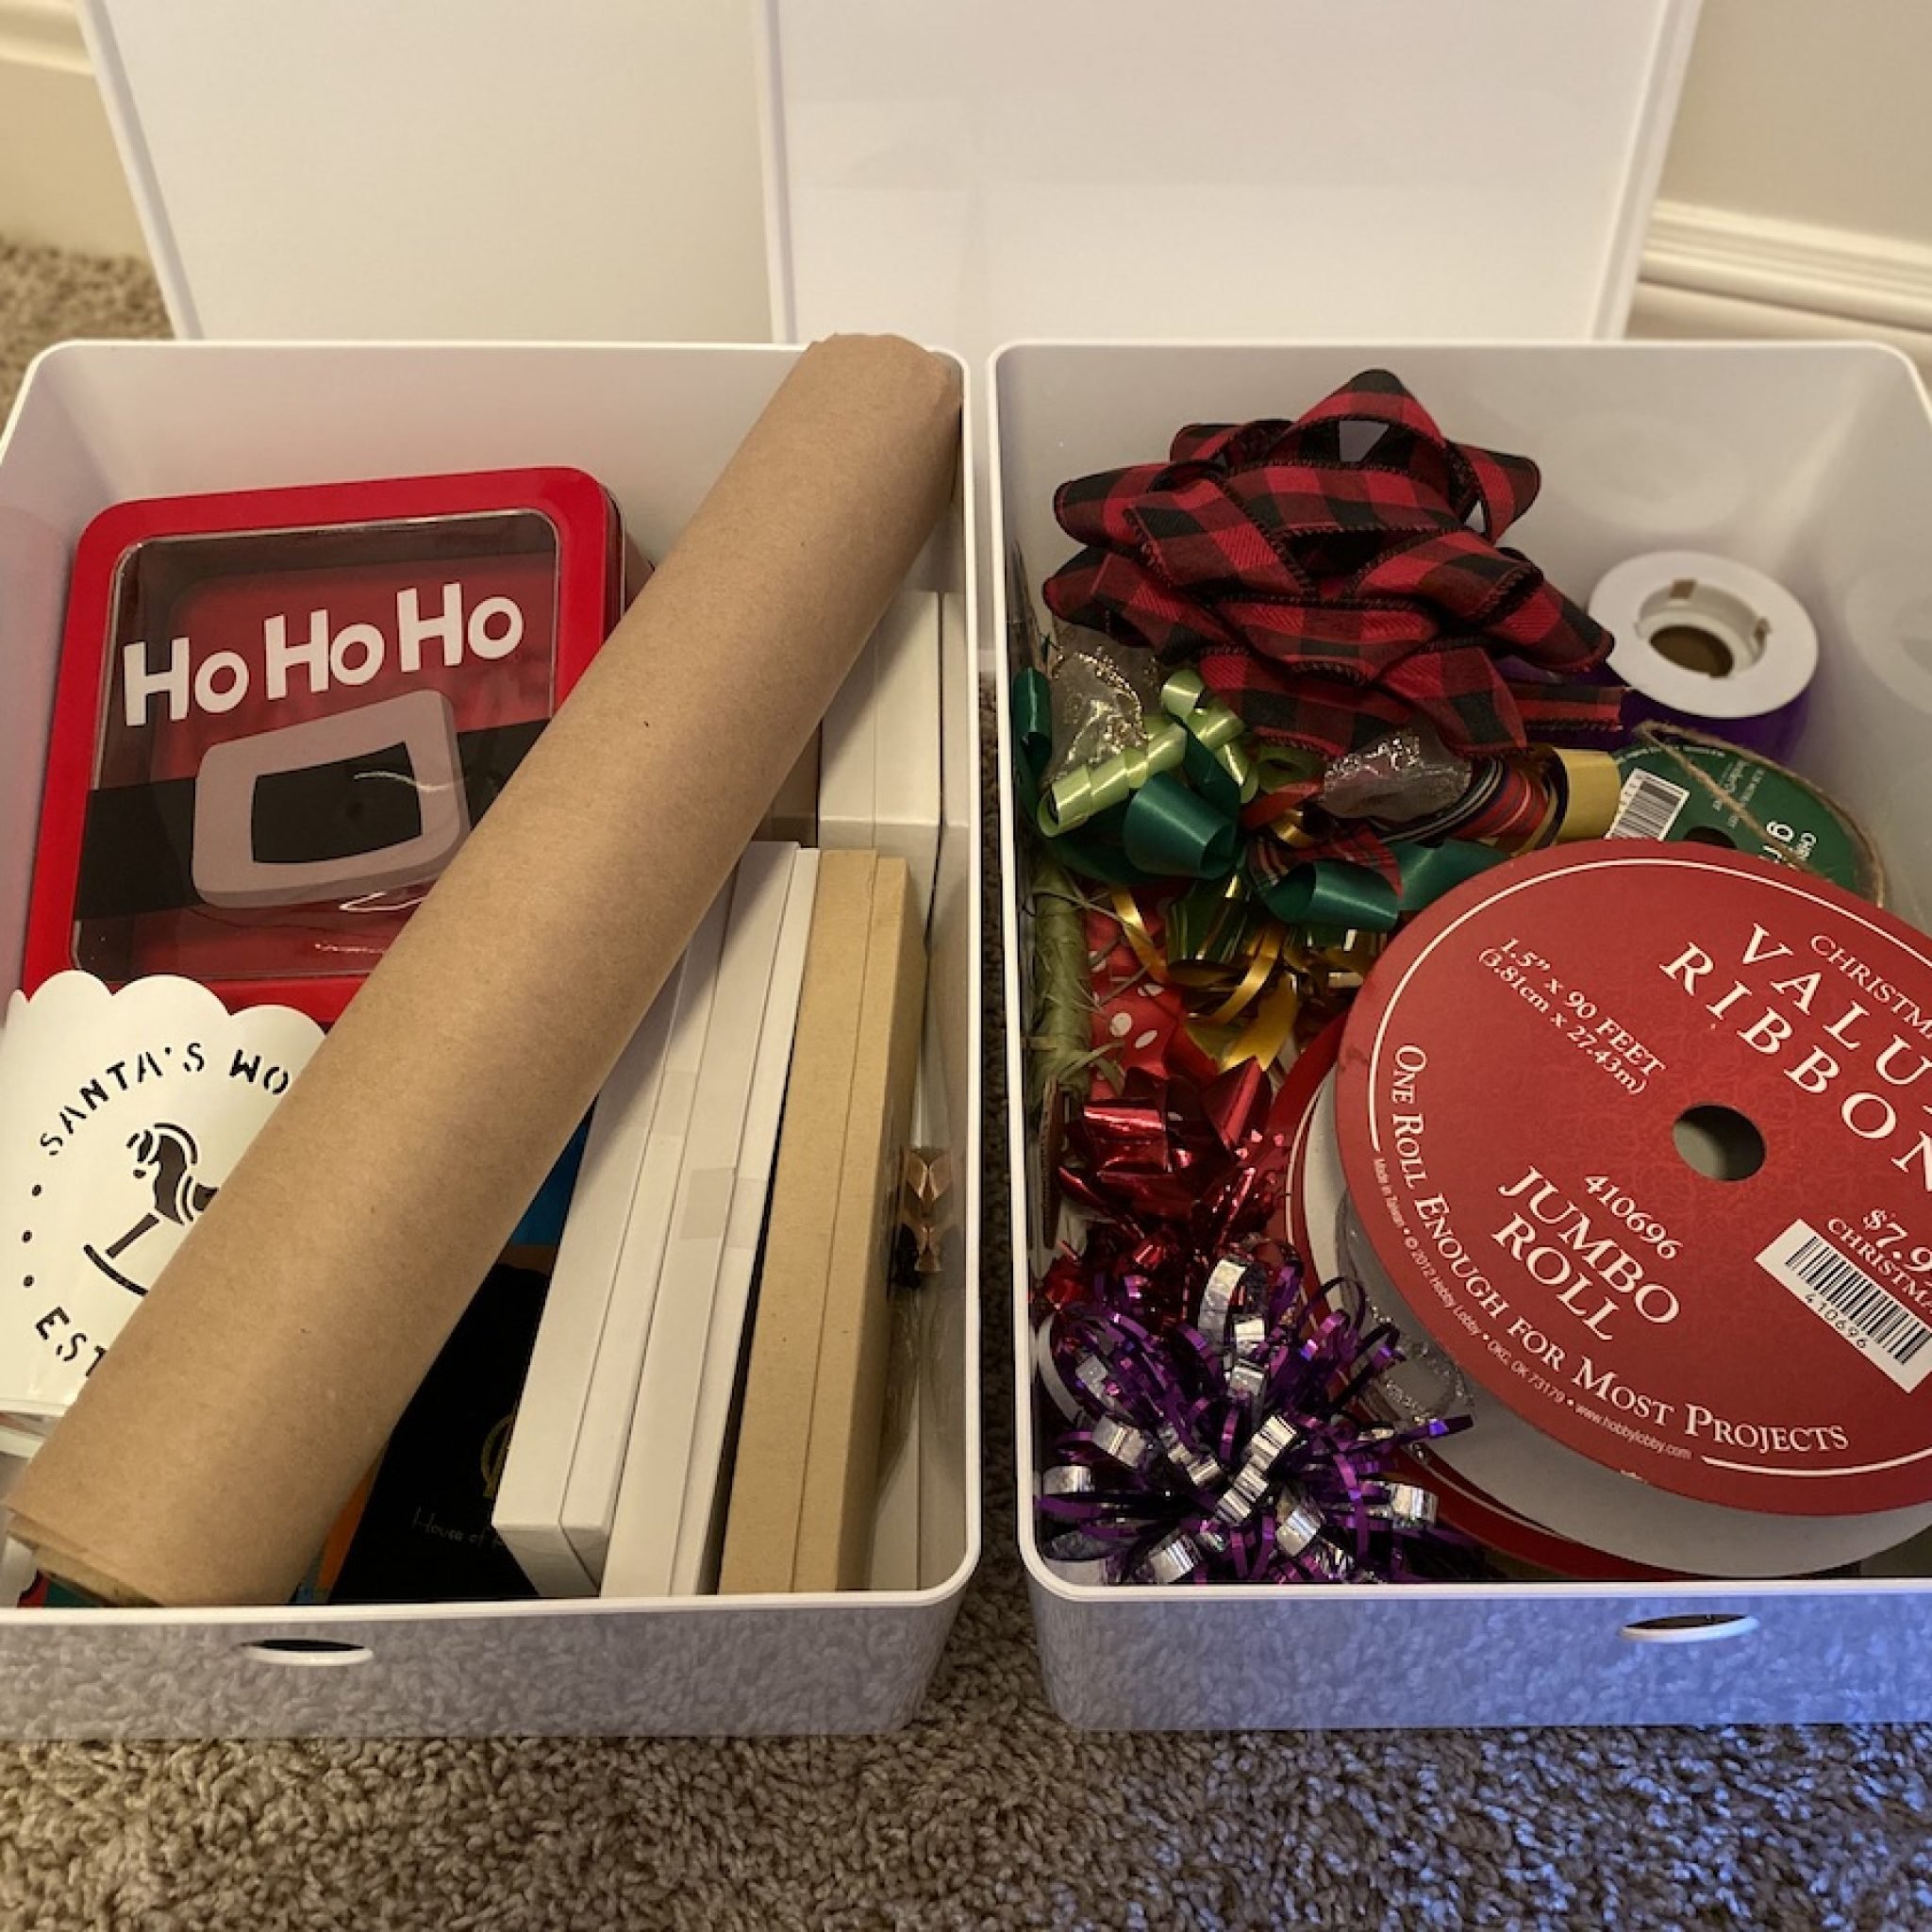
And then the bows, ribbons, boxes, and more in these smaller bins.
I organized books in their own bin, and then the photo albums by year and size.
STEP 5: Add those labels
This is the step that makes it SOOO much easier for your people to put things back in these same places. If you have really littles, you can tape a picture instead of a label to the front of each bin so they know what to put in there. For those that read, I think regular labels work great.
And here’s a little pro tip for you…if your family has trouble putting things away, set one special {labeled} bin in or near your closet where all the lost things go. Until a very special time each week when the whole family empties that bin and puts everything where it actually goes. This could be a great chore for kiddos too.
So that’s it. Here’s our finished product. Deep sigh from me immediately once I saw my new upstairs closet.
I hope this inspires you to tackle one of your home organizing projects! If you find that you are stuck or don’t know where to start, I would love to step in and help! Give me a shout so we can talk about your project.


